Showing posts with label Food. Show all posts

Tuesday, October 25, 2011

Chocolate Covered S'Mores On Sticks

One day I stumbled upon a cool Halloween treat over at Eighteen 25Chocolate covered S'mores on a stick!  I knew I wanted to try them, but I wasn't sure what I would make them for.  I mean, I could've made them just for home, but I knew I would eat them all and then my ass would grow even larger and that is just something I don't want.  Then the perfect opportunity to make these hit me!  Pacen's 4-H club has a monthly meeting and I was in charge of snacks for the October meeting.  Yessssss!!  I gathered all the supplies needed and set to work.  Pacen was in charge of the sprinkles.  :)  Here is how ours turned out


Well, these were a HUGE hit at the meeting...with the young and old!  Parents were asking me how I made them and kids were walking around saying, "Mmmmmm!  These are sooooo good!"  One parent (who wasn't at the meeting) sent me a comment on Facebook telling me her daughter got home and said, "Mom!  Pacen's mom made THE BEST snack!"  Haha!  I'm so glad they were a hit.  Luckily there were a couple left so I got to try one, and I must agree...AWESOME!!

 I almost couldn't quit eating long enough to take this picture!  Haha!!

Head on over to Eighteen 25 to see the full tutorial!  One tip I have: when microwaving the S'mores, make sure the marshmallows are at the gooey/sticky phase before totally assembling and putting in the freezer...I mean really gooey...or they will fall apart when coating with chocolate. 

Here is one of my all-time favorite dialogues about S'mores and it's from one of my favorite movies, "The Sandlot"!

Ham Porter: Hey, Smalls, you wanna s'more?
Smalls: Some more of what?
Ham Porter: No, do you wanna s'more?
Smalls: I haven't had anything yet, so how can I have some more of nothing?
Ham Porter: You're killing me Smalls! These are s'more's stuff! Ok, pay attention. First you take the graham, you stick the chocolate on the graham. Then you roast the 'mallow. When the 'mallows flaming... you stick it on the chocolate. Then cover with the other end. Then you scarf. Kind of messy, but good! Try some!

post signature

Wednesday, August 31, 2011

Wingin' It Roast

Monday night I set out a Boneless Chuck Roast to thaw.  I knew exactly what I was going to fix for dinner on Tuesday evening.  I Love You Chuck! Never-Fail Roast Beef Sandwiches that I found over at Tasty Kitchen on The Pioneer Woman's website.  I had it all planned.  Since the roast is slow cooked on the stove top I figured I'd throw it together during my lunch break and have FWB keep an eye on it since he was just hanging out at my house. 

I got home for lunch and started going over the recipe again.  I only get a half hour lunch break and I knew that wouldn't exactly be enough time, so I decided to forget about the recipe.

"Well, babe.  Screw this!  I'm wingin' it!", I said as I pulled my large crockpot from the cabinet.

Instead of looking at me like I was crazy and saying he'd probably eat out for dinner, he shrugged his shoulders and said, "That's usually when food turns out the best." 

Whew!  He is so laid back.  I love it! 

So, I put the roast in the crock pot, added these...
...and some sliced green and red peppers (even one from my garden!), set the crockpot on high, and headed back to work (after eating some leftover pizza of course). 

I don't know exactly how much of each ingredient I used cause I was just dashing and sprinkling, and pouring so here is a rough guesstimate:
  •  2 pound boneless chuck roast
  • 1 can beef broth 
  • 1 beef bullion cube  
  • 1/2 to 3/4 cup Worcestershire Sauce 
  • 2-3 Tbsp minced onion (I covered much of the top of the roast).  
  • Couple dashes of Liquid Smoke 
  • 1/4 cup or so of Soy Sauce.  
  • Maybe 1/2 Tablespoon of Garlic Salt.  
  • 4-5 seeded and sliced peppers (I sliced up a green pepper from my garden and used some frozen pre-sliced peppers) 
The FWB text me around 4:00 to tell me the house smelled amazing!  When I got home after work I checked the roast and it was done.  It had cooked for 4 hours.  I shredded it and let FWB have a taste.  He thought it was fantastic, but he wanted to know what happened to all the peppers.  Once they cooked, they shrunk a bit so it didn't look like there were many.  I got the bag of frozen peppers back out and added maybe the equivalent of 1-2 peppers.  Looking back I think I would wait to add the peppers.  Add them about a half-hour to an hour before eating. 


I shucked some corn and started boiling them, meanwhile stirring the shredded roast and peppers every so often.  When it was time to eat I piled the roast and peppers on some big hamburger buns with a slice of cheese.  We used the broth concoction for dipping.  Picky eater Pacen even thought the sandwich was good!  FWB decided the roast tasted even better with more peppers.  He ate four sandwiches last night! I will definitely be making this recipe again! 

"When Mighty Roast Beef was the Englishman's Food
It ennobl'd our veins and enriched our Blood:
Our Soldiers were Brave and our Courtiers were Good:
Oh! The Roast Beef of Old England,
And Old English Roast Beef." ~ Richard Leveridge
post signature

Tuesday, August 23, 2011

Weekly Photo Challenge: Dinner

Last week's photo challenge over at A Step in the Journey was "dinner".  Pacen is gone for the Summer so my dinners really don't amount to much, unless I feel like eating leftovers for a week or longer.  Much of my dinners lately have included squash.  Yup, squash.  I planted a garden this year.  Nothing big...a couple tomato plants, a few green bell pepper plants, a few cucumber plants, some asparagus, and a couple squash plants.  Well, holy cow!!  The squash totally took over!  I have gotten a couple cucumbers and the peppers are coming in very nicely, but the squash has done amazing!  I love squash, but I might be sick of it here in the near future.  :)  Next year I think I'll build a couple more garden beds and plant way more things, especially salad veggies!  I think I'll also plant squash and zucchini along the north fence so it can take over as much as it wants.  :)


So, anyway, I have been experimenting with squash.  Last week I made a dinner and used a tried and true method.  I cut a squash in half length-wise, scooped out the seeds, and sprinkled it with cinnamon and brown sugar.  I then baked it until it was soft.  So good! 

Cinnamon/Brown Sugar Squash with Chicken Breast (Squash still looks a little green.  Maybe I should've left it on the vine longer.)
 Last night I decided to create something different.  I had seen some recipes for avocado sticks and zucchini sticks so I thought I'd try something similar with squash.  I cut the squash into sticks (kinda) and sprayed them with olive oil.  I then sprinkled them with Italian bread crumbs, a bit of cayenne pepper, and some dried basil.  I baked them for a while, until I figured they were done.  Mmmmm, they were so delicious! 
Chicken Nuggets and Breaded Seasoned Squash Sticks. 


"My garden is my favorite teacher. " ~ Betsy Canas Garmon
post signature

Friday, July 29, 2011

Whoopie Pies

Lately I've been seeing Whoopie Pies all over the internet.  I don't know as I've ever had a Whoopie Pie.  Well, my interest was piqued and I had the perfect occasion to make these delectable looking mounds of fat and calories.  Pacen had a 4-H meeting coming up and I had volunteered to make cookies or brownies or what have you.  So, I decided to try my hand at Whoopie Pies.  I saw a recipe on Little Miss Momma  using a cake mix.  Well, I decided to try making them from scratch. Yes, I like to live on the edge.

My search for a "from scratch" Whoopie Pie recipe was on!  I typed "Whoopie Pie recipe" in Yahoo!  The option of "best whoopie pie recipe" came up so I thought, "Why not?  Why not make the BEST Whoopie Pie that can possibly be made?"  So I clicked and I clicked again AND I clicked once more.  Here is the recipe I decided to use.  Since I had many children to provide a delectable dessert to, I decided to double the recipe.  Plus I had a 13 oz jar of marshmallow creme on hand instead of a 7 oz, so it only made sense to double the recipe.

I mixed and mixed and when I was done mixing the concoction in the bowl looked just like a thick cake batter.  Maybe it would've been better and cheaper to go with Little Miss Momma's recipe.  Hmmmmm.  We'll soon decide.

When I started dumping mounds of batter on my cookie sheets I was making them rather small.  Then I looked the clock and though, "Crap!  It's past my bedtime and I don't want to be up all night making these things."  So I started dumping big ol' dollops of batter.  When they came out of the oven they looked like the tops of cupcakes.  Hmmmm.  Still thinking the other recipe might've been the better choice since this recipe seemed no different than a cake mix...just more difficult.

Once cooled, I started spreading the filling on the little cakes.  I started out putting just a little and then I decided they needed more.  I went back to the ones with little filling and pried them apart to add more.  They were then oozing with marshmallow-y goodness! 


In traditional "Brooke style" I had to try one before I allowed them to leave my house and be ingested by a bunch of kids, lest they be nasty!  I do not ever want anyone to eat anything I've made and think, "Good Lord!  WHAT is this crap?!  It's so gross!"  I almost always try food before I let anyone else try it, just for that reason. 
I obviously chose one with less filling.  Like I need the extra calories!
So do you want to know my verdict on these supposed "best" Whoopie Pies?  I was not impressed.  Not at all.  There is no way these are the best Whoopie Pies!  No way!  If I decide to make them again I will try Little Miss Momma's recipe.  I assumed the kids liked them though because both pans were completely empty!  I called Pacen to ask him what the kids thought.  He told me he didn't really care for them, but the rest of the kids thought they were great...maybe slightly too big though.  Yup, that settles it.  Next time I'm using a different recipe.

"You can say this for ready-mixes - the next generation isn't going to have any trouble making pies exactly like mother used to make" ~ Earl Wilson
post signature

Wednesday, July 20, 2011

4th of July...Pancakes...Awesome Beverage

This post is so late!  It has to do with the 4th of July.  *nervous whistle...avoiding eye contact*  Hey, at least I'm getting it done before the month of July is over.  :) 

The Friday before the 4th I had a couple of couch surfers from Colorado surf my guest room.  Surfer season is in full swing!  Anyway, the morning they left I made them some patriotic pancakes.  I'm pretty good at dyeing pancake batter, now I need to try the pancake art that I've seen around the internet.  The pancakes were delicious thanks to Bisquick.  :) 

On the 4th of July my family and I went to Crawford as we do pretty much every year.  This year was slightly different though.  Actually, in our family it was a huge change!  There is an annual 5k run/walk from Ft. Robinson to Crawford and my dad has run it every year for I don't know how long.  This year he didn't!  HE DID NOT RUN THE 5K!  Not only were we, his family, in shock over this, but there were numerous people that asked me where he was and why he wasn't participating.  You see, dad not only runs in this event every year, he also kicks butt every year.  He typically comes in 1st in his age group and he's usually in the top three to five overall finishers!  There are a lot of people who run this event so that is saying something considering my dad is in his mid-fifties.  He whoops my ass every year!  This year though, I set my personal best 5k time with 26:10!  Yay, me!  Even though my dad didn't participate, he was at the finish line with my mom and Pacen, cheering me on.  Maybe next year he'll get back into it. 

After the 5k we wandered to Main Street to watch the parade.  Just like every year.  Except this year Quinn, me, and our friend, Mika, sat on the other side of the street from where our family normally sits.  It was too hot to be in the full sun.  We needed shade, especially since Mika and I ran the 5k and we were HOT!  The Crawford 4th of July parade is...well...let's just say it is "something".  It is LONG!  It has quite the array of floats and participants.  It has too many "gaps"!  Pacen, Mika, and I left the parade about a half hour early (it lasted over an hour) to find a nice shady spot in the park where we would be spending the afternoon listening to local bands and pigging out on junk food. 
Aaron, LJ, and Jared aka Cheap Date.  Love them!
After listening to my friends' band we decided to head on up the hill to Harrison.  We shot off fireworks the rest of the afternoon and evening and then I headed home cause I had to work the next day.  I did do something somewhat special for Pacen this year.  I found a fun recipe on Family Fun's website.  It is simply called "Patriotic Drink".  All you need to make it are the following ingredients:
  • Ice cubes
  • Cranberry Juice
  • Diet 7-Up
  • Blue Gatorade
  • Blue food coloring (if you can only find the light blue Gatorade)
Fill a glass all the way with ice.  First pour in the Cranberry Juice.  Next, slowly pour in the Gatorade, making sure to pour it directly onto an ice cube.  Finally, slowly pour in the Diet 7-Up, again making sure to pour it directly onto an ice cube. 

 Since each drink has a different sugar content (Cranberry Juice having the most sugar and Diet 7-Up having the least) the drinks are able to "stack".  They will eventually mix, but I think it is so cool to see them stacked up.  Pacen thought it was pretty cool too, and even though he's not a big fan of Cranberry Juice he drank many glasses of the "Patriotic Drink". 

"I love my freedom.  I love my America." ~ Jessie Lane Adams

post signature

Sunday, March 27, 2011

Golfing Cake

Today is my dear friend/co-worker's 40th birthday. I decided I would surprise her with a cake in the morning. Well, it's not necessarily a surprise cause I asked her what kind she wanted, but the final version is a total surprise. A while back a blog I follow, Sisters Stuff, made a post about a golfing cake. Twyla and her husband love to golf so I thought it would be the perfect cake for her.

I think this is maybe my 3rd fondant covered cake...and I feel I didn't do too bad. Still need practice, but I think Twyla will like it! When I got done with the cake I looked outside and this is what I saw! Mother Nature is a dirty tease! It has been pretty nice lately and everyone was sure Spring was finally here, but then this has to happen! Ugh! I guess it is kind of pretty though. A little.


Look how BIG the flakes are! Good grief!


"I wanted to buy a candle holder, but the store didn't have one. So I got a cake." ~ Mitch Hedberg
post signature

Wednesday, March 23, 2011

Luck O' The Irish

Okay, so...this post is a week late, but...ummmm...better late than never I guess. On St. Patrick's Day I wanted to surprise Pacen with a cool breakfast, even though he normally doesn't want anything to do with breakfast. So, I drug my sleepy butt out of bed at 6:00 so I could get ready for work and get this special breakfast done before it was time to head out. Mind you, I am NOT a morning person, but if I have something special to do then I will get up at any hour. What is this special breakfast, you may be asking. :) Well, it was rainbow pancakes with little gold coin pancakes. Haha! Yup! Easy really. All I had to do was add food coloring to the pancake batter.

Well, I finally got the pancakes done and when I woke Pacen I told him there was a surprise for him in the kitchen. He looked at me and said, "MOM! It's breakfast isn't it? I DON'T eat breakfast!" (Obviously he's not a morning person either.) Well, he could obviously tell that his remark "deflated" me so he went in the kitchen to see what his surprise was. He was actually pretty impressed and decided he'd try a couple. Then he said, "Wow, mom!! These are the best pancakes that you've ever made! They aren't crumbly like usual." Haha! He is right though...normally my pancakes crumble and these ones were actually thick and fluffy. Maybe the luck o' the Irish was with me...helping me make perfect pancakes. Haha!


About ten minutes before we were to leave for work Pacen informed me that we forgot to dye his hair green like we normally do for St. Patty's Day. So, in a hurry I grabbed the green paste food coloring, dipped my fingers in, and proceeded to run them through Pacen's hair. What a mess! Luckily it got the job done and we were only a couple minutes late for work. Ummm, did I mention that Pacen had a wrestling exhibition the night of St. Patty's? Haha! Maybe it was the color of his hair that caused him to win...or the luck o' the Irish was with him. :)


"May you die in bed at ninety-five years, shot by a jealous husband (or wife)." ~ Irish Toast


post signature

Friday, November 5, 2010

Best-Ever Carrot Cake


Last week one of the linemen (I work at an electric cooperative) brought me some carrots from his garden. I was so excited! Fresh carrots are the best! When I was little my sisters and I would run out to the garden, try to pick the biggest carrot, barely brush the dirt off, and eat it. Mmmmmm...so good! Anyway, later I saw the same lineman and he requested I make a carrot cake from scratch. He remembered the last time I'd made one, which surprised me cause that was a good 4-5 years ago! Wow...must've been a really good carrot cake! So, being the nice person I am, I went ahead and made the linemen a carrot cake from those fresh carrots. Pacen was so bummed that they got the whole cake so I let him have a sliver and tonight I made him a cake of his own. It will be a nice surprise for him in the morning. A not so nice surprise will be that he has to share it with me. :) The recipe I use is out of the Better Homes and Garden cookbook. Yes, the famous plaid cookbook. It is called "The Best-Ever Carrot Cake" and it lives up to its name. I also made Cream Cheese Frosting from scratch and used a recipe out of the same book. Here are the recipes.

Best-Ever Carrot Cake

4 beaten eggs
2 cups all-purpose flour
2 cups sugar
2 tsp baking powder
1 tsp ground cinnamon (optional, but I suggest you use it!)
1/2 tsp baking soda
3 cups finely shredded carrots* (lightly packed)
3/4 cup cooking oil
1/2 cup finely chopped pecans, toasted (optional...I didn't use them)

Allow eggs to stand at room temperature for 30 minutes. Meanwhile, grease and flour (or use grease and wax paper) two 9 x 1 1/2-inch round cake pans. Set pans aside. In a large mixing bowl stir together flour, sugar, baking powder, cinnamon (if desired...and trust me it should be desired), and baking soda.

In a medium bowl combine eggs, carrots, and oil. Add egg mixture to flour mixture; stir until combined. Pour batter into prepared pans.

Bake in a 350-degree oven for 30-35 minutes or until a wooden toothpick inserted near center comes out clean. Cool on wire racks for 10 minutes. Remove from pans and cool thoroughly on racks.

Frost tops and sides with Cream Cheese Frosting. If desired, sprinkle chopped pecans over frosting. Store cake in refrigerator for up to 3 days.

*NOTE: The carrots need to be finely shredded or they may sink to the bottom of the pan during baking.

Cream Cheese Frosting

1 8-ounce package cream cheese, softened
1/2 cup butter or margarine, softened
2 tsp vanilla
5 3/4 to 6 1/4 cups sifted powdered sugar (I only used 4 cups cause I think too much takes away from the cream cheese flavor.)

Beat cream cheese, butter, and vanilla with electric mixer until light and fluffy. Gradually add 2 cups of the powdered sugar, beating well. Gradually beat in additional powdered sugar to reach spreading consistency. (Like I said...I only used 4 cups and it tastes great!)

"Vegetables are a must on a diet. I suggest carrot cake, zucchini bread, and pumpkin pie." ~ Jim Davis

Tuesday, October 27, 2009

My Little Picky Eater

My son is probably the oddest picky eater ever! He is opposite of most picky eaters I have come across. He loves vegetables and salad and stuff like that and hates things such as spaghetti and macaroni & cheese! I thought all kids loved spaghetti and macaroni & cheese! Not mine! I am a total pasta person and if I want pasta I usually have to order it at a restaurant or make it while Pacen is gone...unless, of course, I want to hear a bunch of whining, which I don't!

Yesterday I was trying to decide what to fix for supper last night. I've been having major difficulties the past month because I have been oven-less! It has been dreadful! I always knew I used my oven a lot, but I guess I never realized just how much until mine died. Rest in peace old, ugly oven! I was suppose to have a new oven by now but there was an accident. My family owns two True Value stores...one in the town I grew up in and the other is in a town 30 miles from there. My dad drove to the other store, picked up my new oven, and on the way home a semi drove past him and blew my oven over (yes it was tied down) and broke the glass out of the door! It's my luck! Things like this always happen to me! I don't know what I ever did to deserve the luck I have, but I guess I just have to live with it. Maybe I can offer some sort of sacrifice to the gods/goddesses/higher beings/whatever so my luck will change. I offer my old oven! :) Okay, anyway...my new oven door has not arrived yet for my new oven so I am still oven-less!

Oh, I got really side tracked there. Sorry. So, I was searching for something to fix for supper, something that could be made on the stove top. That is when I came across a skillet recipe on this blog that I follow. I had almost all the ingredients and I had other things I could use to substitute for the ingredients I didn't have. No grocery store visit? Yay!!!! :) So, I fixed up the recipe when I got home from work and it looked nothing like the picture on the blog so I was a little leery about serving it to Pacen, but we have a rule in my house: I fix it, you eat it. Maybe I should make that rule with the pasta too, but I try to avoid making things that I know he absolutely does not like. Anyway, the time came to serve it up and he loved it! He had two huge servings and is excited that we are having it as leftovers tonight! Yahoo!!! I love it when I find a recipe that is easy and that Pacen likes! This recipe is definitely going in the "make again recipe box"!

So, without further adeu, here is the recipe (and my substitutions/changes):

Romano Ranch Chicken and Rice Skillet Dinner

- 2 large boneless skinless chicken breasts
- 1 packet Ranch Dressing dry mix, divided
- 1/4 cup extra virgin olive oil
- 1 large onion, finely diced (I used a little onion powder)
- 1 green bell pepper, diced
- 6 cloves fresh garlic, minced (I used the pre-minced kind in the jar, which is the best thing since sliced bread)
- 6 cups fresh spinach leaves, coarsely chopped (I used about a 1/2 bag of frozen spinach, which I would guess was around 10 oz.)
- 1 small can diced carrots and peas, drained (I used a 15 oz. can of just peas)
- 2 cups steamed long grain brown rice (I used instant brown rice cooked in the microwave)
- 1 tsp salt
- 1/4 tsp black pepper
- 1/4 tsp garlic salt
-1/2 cup shredded Romano Cheese (I used Cheddar Cheese)

The first step is to preheat the oven to 350 degrees. Ha! I ended up cooking my chicken in the skillet over medium heat, which was a lot faster than baking it in the oven anyway. While the chicken was cooking I diced the pepper and started the rice. When the chicken was done I removed it from the skillet and drained any juice that was left. I then added the olive oil and let it heat up. Next I added the green pepper, garlic, spinach, and onion powder and let saute for 6-10 minutes (until the spinach was heated through). While the veggies were sauteing I cut up the chicken. Next I added the peas, cooked rice, salt, pepper, garlic salt, and ranch mix. I stirred it up and let it sit for a few minutes to heat through. I then added the chicken and cheese and stirred again. Time to serve! Easy and pretty fast! (It just sounds more time consuming than it really is.)
(The lighting in my kitchen is dreadful!)


"When baking, follow directions. When cooking, go by your own taste." ~ Laiko Bahrs

Monday, October 19, 2009

Grape Harvest

There is a cute little white picket fence in my backyard that runs along the driveway...from the back gate to the garage. Unfortunately you can't even tell there is a white picket fence there because it has been overrun by about three different kinds of vines! Fortunately a couple of those vines produce grapes. A few weeks ago I was taking the trash out and I happened to glance over at the vines closest to the garage and lo and behold there were tons of marble size grapes (the other grape vine produces pea size grapes that I feel are kind of pointless so I let them go to waste every year). I tried one and boy was it good...a little tart, but much better than the small ones. That night Pacen and I picked most of the bunches of those grapes off the vine (at least 98% of them).


When I got done removing every grape from each bunch we had around 11 pounds of grapes!


I decided to make some jelly and juice. I found a couple recipes online. You will not believe this but I used a recipe that did not come from recipezaar.com. :) Here is the recipe:

Easy Homemade Grape Jelly

5 pounds of fresh grapes
Pectin
Around 7 cups of granulated sugar
Canning stuff (jars, lids, strainer, etc.)

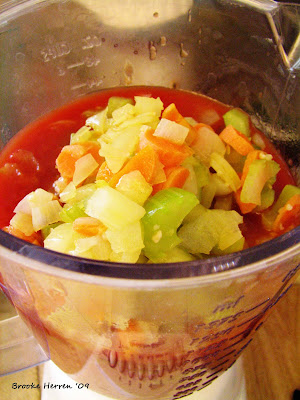
Wash your jars. Now wash the grapes and then chop or mash them very well. I used a potato masher to mash them, but you can also use a food processor. (We're hoping to get at least 5 cups of juice from the grapes.) Put the mashed grapes in a large pot on the stove over medium to high heat and heat to a boil, then reduce the heat and simmer for 10 minutes (stir every so often so the grapes don't stick or burn). Meanwhile, measure out the sugar. Mix the dry pectin with 1/4 cup of sugar and set aside. When the grapes are done simmering put them through a strainer or cheesecloth. Pour the hot grape juice into a large pot and add the pectin/sugar mixture stirring to dissolve. Put the pot on medium to high heat until the juice is at a full boil (the kind that can't be stirred away). Make sure you stir frequently so it doesn't burn. Put the lids in a pan of hot water so they can begin to soften. Add the remaining sugar (6 3/4 cups) to the the juice and bring back to a boil and boil HARD for 1 minute. Fill the jars, put the lids and rings on, and process the jars in a boiling water bath (how long depends on altitude...I processed for 10 minutes).


After making the jelly I still had 6 pounds of grapes sitting on my counter. I would've made more jelly, but I was out of jars and didn't feel like going to the store so I opted to make juice. Here is the juice recipe:

Homemade Grape Juice

5-6 pounds of fresh grapes
Cheesecloth or sieve
large pots

Mash the grapes with a potato masher and put into a large pot on the stove over medium heat. Slowly heat to a simmer and simmer for 10 minutes. Stir occasionally and halfway through cooking mash the grapes some more. Prepare the cheesecloth (I put some cheesecloth in a colander over a bowl). Ladle the cooked grapes over the cheesecloth and let sit for several hours or overnight in the fridge to strain completely. Now you can remove the cheesecloth and rinse and then strain the grapes again, but I just strained once. Pour juice into a container and enjoy. Mine made about 2 quarts. It was good but kind of tart.


Maybe next year I'll decide to use the little grapes too. We'll see. Everyone keeps asking me why I didn't make wine. Well, to be quite honest...I HATE wine! I do have a lot of friends that love that nasty beverage though, so maybe next year I'll make some wine for my "wino" friends (using the little grapes). :)

"The sun, with all those planets revolving around it and dependent on it, can still ripen a bunch of grapes as if it had nothing else in the universe to do." ~ Galileo Galilei

"
We ought to do good to others as simply as a horse runs, or a bee makes honey, or a vine bears grapes season after season without thinking of the grapes it has borne." ~ Marcus Aurelius

Thursday, September 24, 2009

Another Apple Creation

So I had my mom pick some more apples for me because I really wanted to try an apple pie recipe I had found. Glad I had her go to that trouble because the pie turned out DELICIOUS! :) It was easy to make too...no lattice work for the top crust or anything! The only problem I had with it was the fact that I "baked" it for 30 minutes before realizing my oven had died on me (both a good thing and a bad thing...that oven is so old and I hate it, but it wasn't a good time for it to meet its end). Just my luck. I ended up running the pie over to my sister's apartment to bake and, my luck again, I had grabbed the wrong key to get in. She was on her way to my house so she swung by her place to let me in. What a hassle! It was totally worth it though and I suggest you all try this pie at least once!

My dad just called to tell me he thought this pie was one of the best he's ever had (I sent a piece with Raine for him). So, there you go...try this recipe!

Yummy Crunchy Caramel Apple Pie

For Pie:

Pastry for single crust pie (I use this recipe for all my pies)
1/2 cup sugar
3 Tbsp flour
1 tsp cinnamon
1/8 tsp salt
6 cups thinly sliced, peeled apples (I used my dad's apples, but I would think any would work)

Crumb Topping:

1 cup packed brown sugar
1/2 cup flour
1/2 cup quick-cooking rolled oats
1/2 cup butter

Final Topping:

1/2 cup chopped pecans (I left this out as I'm not a big fan of nuts in baked goods)
1/4 cup caramel ice cream topping (or as much as you think is necessary)

Prepare pastry for single-crust pie, being careful not to stretch the dough too much. Place in pie plate, trim and crimp edges (I'm not good at this part). In a large mixing bowl, stir together sugar, flour, cinnamon, and salt. Add apple slices and gently toss until they are coated well. Transfer mixture to pie.

For the crumb topping: Stir together brown sugar, flour, and oats. Using a pastry blender, cut in the butter until topping resembles coarse crumbs. Sprinkle over apple mixture.

Cover edge of pie with foil. Bake at 375 degrees for 25 minutes. Remove foil and bake 25-30 minutes more, or until top is golden. Remove from oven and drizzle top with caramel topping, then sprinkle with pecans. Cool on wire rack and serve!

"My tongue is smiling." ~ Abigail Trillin

Tuesday, September 15, 2009

Fall Harvest

There is only one thing to do when your dad's apple trees go wild and produce hundreds of apples! Bake, bake, and bake some more! Quinn has been baking apple pies, apple crisp, cinnamon apple slices, etc. It has all been very delicious! Dad's apples have the best combination of sweet and tart flavors! Perfect for baking!

I picked two plastic grocery bags of apples and looked up many recipes. I finally decided to make some apple butter. I haven't had it in years and I thought Pacen would enjoy it. It turned out pretty good if I do say so myself. :) I have a caramel apple pie recipe I want to try, but I'll have to wait until I am able to pick more apples (I better hurry because it will be freezing soon).

APPLE BUTTER

Apples (enough to overfill a 4 quart crock pot)
1/2 cup vinegar
3 cups white sugar
1 cup brown sugar
3 tsp. ground cinnamon
1/4 tsp. ground cloves

Peel, core, and slice the apples. Add vinegar and cook on low for 18 hours (10 hours on high if your crock pot cooks fast). Stir occasionally. Add white sugar, brown sugar, cinnamon, and cloves. Stir thoroughly. Put into blender and blend until smooth. Put back in crock pot and cook four more hours. Seal in jars. Makes almost 6 pint jars.

This was just about half of the apples I used. Yeah, they look kind of rough but that's from a hail storm.


See the apples on the side? That's what the whole batch looked like before blending it. I was nervous for a while that it was ruined.


"Almost all wild apples are handsome. They cannot be too gnarly and crabbed and rusty to look at. The gnarliest will have some redeeming traits even to the eye." ~Henry David Thoreau

Monday, August 24, 2009

Mmmmmm, delicious!

My co-worker's (Twyla) husband (Jim) requested some homemade cookies a while back and last week I decided it was the perfect time to make some. A couple of weeks ago some people moved into the house just down the street so I decided to make a double batch of homemade Soft Chocolate Chip Cookies...enough for the new neighbors (as a "welcome to the neighborhood" gift), Jim & Twyla, Doug & Julie (some friends), the linemen, a really nice salesman that was going to be at the NEA the next day, and a few for me!

Earlier this year I found the best Soft Chocolate Chip Cookie recipe. It is the only one I use now and you'll never guess where I found it...recipezaar.com! Did you sense the sarcasm? Yeah, so recipezaar.com is where I get many of my recipes. It's a great site! You should check it out if you haven't yet done so.

This Chocolate Chip Cookie recipe is DELICOUS! The linemen literally devoured their large plate of cookies within fifteen minutes or so! The salesman called today and told Rick (Line Superintendent) to tell me not to make him anymore cookies because he ate his plate all by himself! Twyla told me they were the best cookies she's had in a long time. She also mentioned how hard it was not to eat them all before Jim got any. So...I suggest you try these cookies! You won't regret it...unless, of course, you eat the whole batch by yourself, which may happen. Maybe these cookies should come with a warning.

Warning: These cookies are so devilishly delicious that you may not be able to quit eating them. You might create an addiction! (There, you've been warned!)

Oh, and as far as the new neighbors are concerned, I haven't heard if they liked the cookies or not, but even if they didn't, it felt good to be a nice neighbor. I like to give...it makes me happy to make others happy.

"Giving is more a dictate of the heart than a command of the brain." ~ Henry A. Rosso

Saturday, July 11, 2009

Soup in the summer?

While I was on the Morning Star (the live-aboard I was on in The Bahamas) we were served many delicious meals. My favorite was the creamy tomato soup. I've never been much of a soup in the summer kind of girl. I always just thought of it as a winter food. When we were served soup and sandwiches for lunch one day I decided to go ahead and try the soup. OH. MY. GOODNESS. It was the best soup I think I've ever tasted! I immediately asked Chef John for the recipe and he just kind of laughed at me and said, "It's just creamy tomato soup." He was nice enough to pass the recipe on though and last week I made it for my family. It pretty much tasted the same...except I accidentally put too much salt in it. I also made my favorite pasta salad and BLT's.

Without further ado, here is the recipe for the creamy tomato soup, which I am now calling:

Famous Chef John's Creamy Tomato Soup

Olive oil
3 carrots, diced
4 stalks celery, diced
1 large onion, diced
1 64oz can Tomato Juice
4 cloves garlic, minced
2 1/2 quarts Heavy Cream
1 large can diced tomatoes
Dry basil, to taste
Garlic Salt, to taste
White Pepper, to taste
Kosher Salt, to taste
1 tsp sugar

Sautee the carrots, celery, onion, and garlic in olive oil until soft. Put the tomato juice and sauteed vegetables in a blender and puree.

Mix the puree mixture, heavy cream, and can of diced tomatoes in a large pot. Add the seasonings to taste and heat over low to medium heat until hot, stirring frequently.
Viola! That's it! Oh, and I must say...this version of the recipe will feed A LOT of people! I suggest you half it. I halved it and there were still plenty of leftovers (I fed 5 with it).

Now the recipe for my favorite pasta salad!

Brooke's Favorite Pasta Salad

1 16oz box of Garden Rotini (the multi-colored pasta)
1 block of mild cheddar cheese
1 block of mozzarella cheese
1 block of Colby & Monterey Jack Cheese
1 package of Pepperoni
2 - 3 small cans of sliced black olives, drained
1 bottle of Kraft Sun-Dried Tomato Vinaigrette Dressing

Cook the pasta according to the directions on the package. While the pasta is cooking cut the cheese into small squares and cut the pepperoni slices in half. When the pasta is done, drain and rinse with cold water. Put the pasta in a bowl and add the remainder of the ingredients. Use as much dressing as you like (I usually use 1/2 - 3/4 of the bottle.) Another ingredient I sometimes add is halved cherry tomatoes. Mix thoroughly.

Thursday, July 2, 2009

Dinner with good company

For about a month or so my sisters and I have been setting aside one night a week to get together and have dinner. We take turns at each others houses. A couple weeks ago we had it at my house and I made Cheese and Chicken Enchiladas. We were on a Mexican "kick" for a couple of weeks...Tacos at Raine's one week and Enchiladas at my place the next. Who doesn't love Mexican food though, right? Okay, I'm sure there are a few strange people out there that don't like it, but I think Mexican food is DELICIOUS! It's even better when you can enjoy it with good company! :) Unfortunately I didn't take any pictures of my sisters and I...just the food. Tonight we had dinner at Quinn's. She made BBQ chicken, pasta salad, and rice. It was yummy. Still no pictures of us girls though. I'll have to remember next time!

Anyway, I found the recipe on my favorite cooking/baking site, Recipe Zaar. This is where I find many of my recipes. You can pretty much find any recipe on this site. I love it! The good thing about the Cheese and Chicken Enchilada recipe is that it can be made as a OAMC (once a month cooking) recipe! I ended up freezing half.

Cheese and Chicken Enchiladas

1 1/2 cups shredded chicken breasts
1 cup reduced-fat sharp cheddar cheese
1 cup picante sauce
3 ounces neufchatel cheese (1/3 fat free cream cheese)
1 tsp cumin
1 1/2 cups bottled green taco sauce
flour tortillas

I put 4-5 frozen chicken breasts in a crock pot. I then covered the chicken in picante sauce and cooked on high for 4 hours. I then used two forks to shred the chicken. Spray a skillet with cooking spray and heat over low heat. Mix the chicken, 1/2 cup cheddar cheese, picante sauce, and cream cheese. Add to the skillet and cook until cheese begins to melt. Spoon about 1/3 cup filling on each tortilla and roll up. Place enchiladas (seam side down) in a 9x13 baking dish. Drizzle with taco sauce and remaining cheese. (At this point you can freeze some if you want. Just put them in the freezer until hard and then bag them. To cook, just thaw in the fridge and bake.) Cover and bake at 350 degrees for 15 minutes.

"A sister is a forever friend." ~ Unknown

"It is better to be alone than in bad company." ~ George Washington